


conchas: strawberry cheese

Hello, hello. :)
I feel like I need to write some sort of “catch-up” post for y’all soon. So much has happened already this year. Unfortunately not all that positive either, but we’re hanging in there. <3 I hope y’all are, too.
I’ll be back with more dumb monthly posts about bad movies and self care bakes real soon. It’s so hard to be vulnerable on the internet, haha.
But until then, recipe!
I know chocolate or red velvet are the typical staple flavors of the holiday, however I figured I’d explore another flavor that can be considered romantic or “cutesy”, if you will.
This is a recipe that can easily be shared amongst a crowd, or you can halve the ingredients and just share them with a special someone.
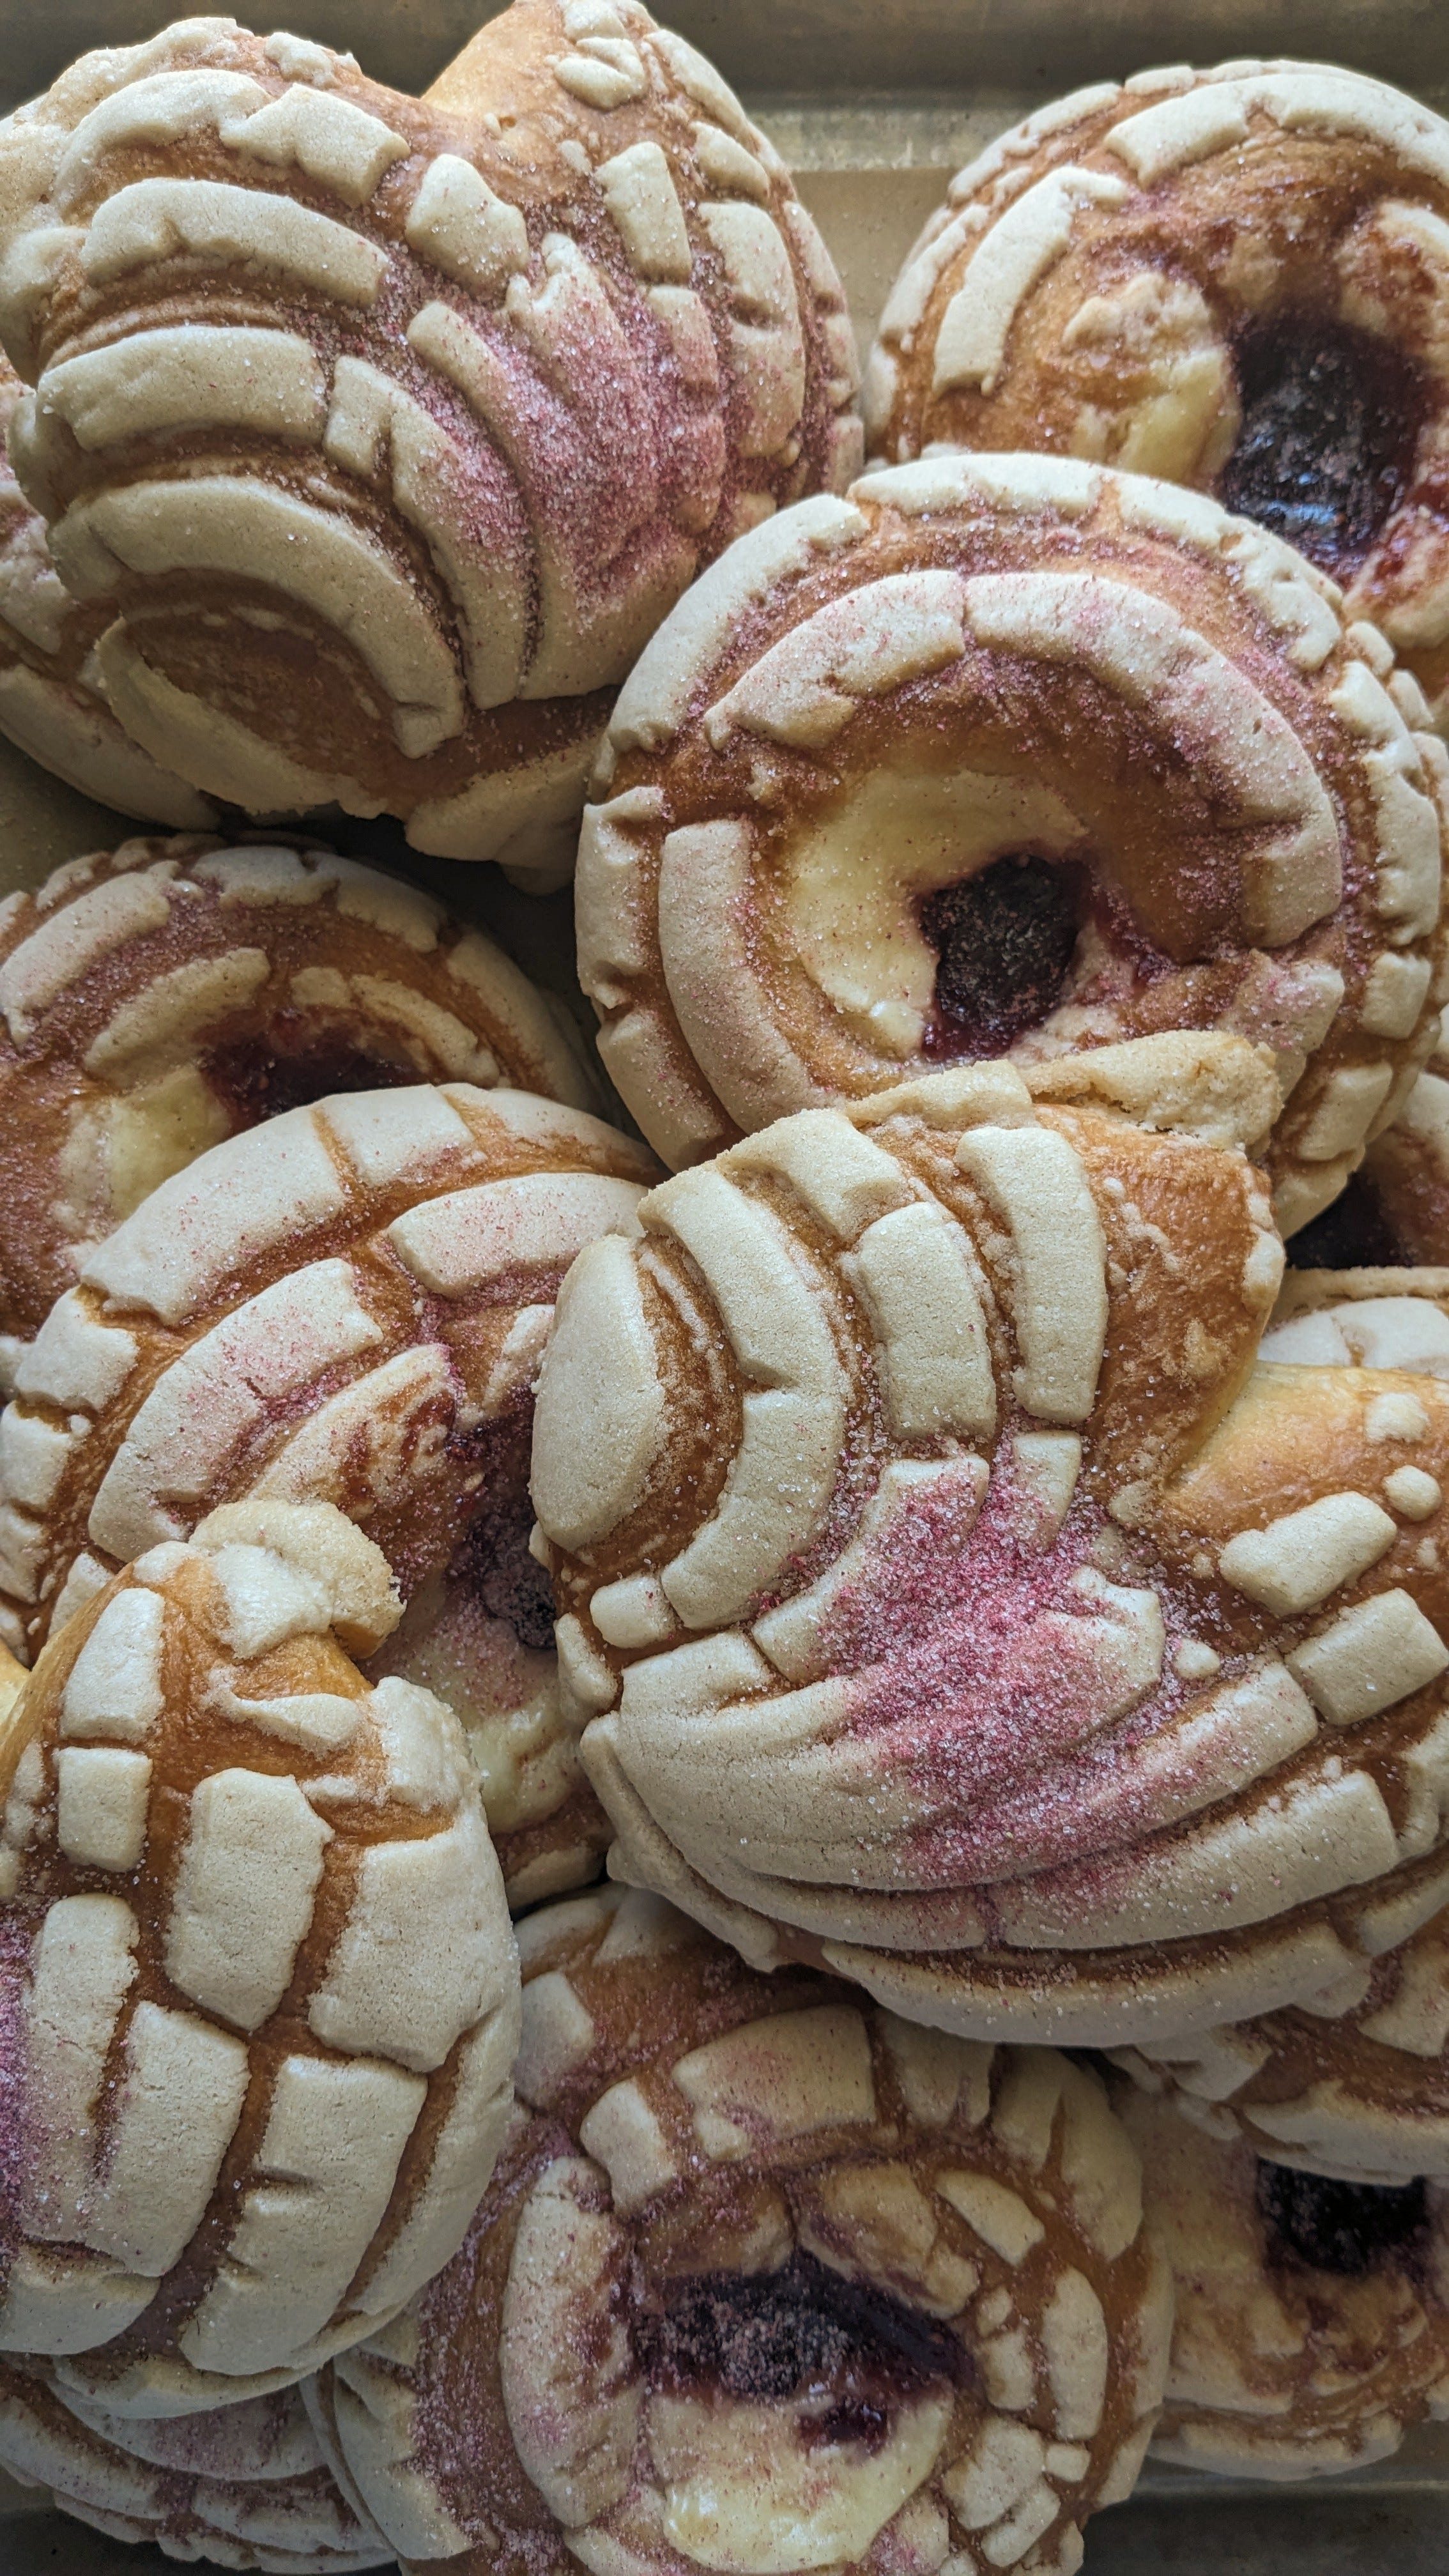
Not to be confused with a danish - these conchas are mostly traditional, however they have a delightful strawberry cheese-inspired filling.
Conchas are assembled and proofed. Before they are put into the oven, a crevice is created at the center of each concha and filled with cream cheese filling and strawberry preserves.
As always, I encourage you to explore outside of those flavors if you’d like. If your partner likes citrus, maybe replace the strawberry preserves with some citrus curd. Maybe they really love chocolate and you want to honor that - drizzle some melted chocolate over the conchas after baking!

CONCHAS: STRAWBERRY CHEESE
Makes: 12-15 conchas | Prep Time & Rest Time: hours lol | Cook Time: 24 minutes | Chill Time: 12 hours (overnight)
Dough:
475 grams bread flour
30 grams milk powder optional
50 grams cane sugar
1 teaspoon kosher salt
1 teaspoon Ceylon cinnamon
240 ml whole milk warmed to 100F-110F
1 teaspoon sugar or honey added to milk before warming
10 grams active dry yeast
3 eggs, large cold
165 grams salted butter cold and cubed
Egg wash:
1 large egg whisked
1 tablespoon milk
Concha topping (Pasta):
130 grams confectioners’ sugar
130 grams all-purpose flour
130 grams shortening
Pinch of sea salt
2 teaspoons pure vanilla extract
Strawberry Cheesecake filling:
227 grams cream cheese softened
70 grams cane sugar
1 egg large
pure vanilla extract
pinch of kosher salt
1 jar of strawberry preserves (or any other fruit of choice)
Pink Sugar (optional):
50 grams cane sugar or granulated
10 grams red freeze dried fruit, such as strawberry or raspberry
blend these two ingredients together well using a blender or food processer
Suggested Tools
Stand Mixer w/ dough hook attachment
2-3 13 x 18” sheet pans
dough or bend scraper for portioning dough
piping bags for filling optional, just makes the process a little easier
Day One Preparation
Make the Concha Dough
Heat 240 ml of whole milk with a teaspoon of sugar or honey, just until warm to the touch (100-110 F/40-45 C). Whisk in 10 grams of active dry yeast and set aside to activate, becoming foamy and bubbly after 5-10 minutes.
To the bowl of a stand mixer, combine 475 grams of bread flour, 30 grams of milk powder, 50 grams of cane sugar, 1 teaspoon of kosher salt and 1 teaspoon of Ceylon cinnamon. Combine the ingredients together using a whisk, and make a well at the center of the flour using your hand.
To the flour well, add the yeast and milk mixture, 3 cold large eggs, and 165 grams of cold cubed salted butter.
Attach the bowl to a stand mixer, and begin kneading on speed 2 for 10 minutes. This will allow enough time for everything to come together and mingle.
Increase the mixer speed to 4, and allow the dough to knead for 25-30 minutes, or until the dough is very smooth and pulls away clean from the sides.
Roll the dough into a ball (it will be very soft), and place it into a large, lightly oiled bowl. Cover the bowl tightly with plastic wrap and set in the fridge for an overnight rise.
Prepare the Pasta
To a medium bowl or clean stand mixer bowl, combine 130 grams of flour, 130 grams of confectioners’ sugar, and 130 grams of shortening.
Begin mixing with a rubber spatula, by hand, or with a paddle attachment set to low speed if using a stand mixer. As you mix, gradually add in a pinch or two of salt, and stream in the pure vanilla extract.
Continue to mix until the pasta has come together like a soft cookie dough, and you’re able to press and knead the pasta together between your hands.
Massage the pasta to ensure there are no clumps of flour or sugar remaining. The heat of your hands will help to soften the dough as well, making it smooth and perfect for molding.
Wrap securely and allow to rest at room temperature overnight.
Day Two Preparation
Shape the Dough
Turn the cold dough out onto a clean, lightly oiled surface or baking mat.
Weigh the dough, and divide the weight in grams by 12 or 15, depending on how many pieces of bread you want. Divide out the dough based on that number - I usually weigh out 75 grams per piece for a total of 15 pieces.
Roll each piece into a ball. I like to press down onto the cold dough with my palm to warm it up a bit as I roll.
After all the dough has been shaped, re-roll each piece again, and place them directly only sheet pans lined with parchment paper. You can fit up to 6 conchas per 13 x 18” sheet pan.

Cover the conchas with a kitchen towel or plastic wrap, and allow the dough to rest and rise for 60 minutes, or until visibly larger but not fully doubled.
Assemble the Conchas
In a small mug or bowl, combine a large egg with a tablespoon of milk or water. Mix together well using a fork.
Brush each dough ball with the egg wash.
Divide the pasta (concha topping) into 12-15 equal sized pieces. Weigh and divide for better accuracy.
Roll each piece between your hands to form a smooth ball.
Prepare your concha stamp or paring knife by flouring it, and locate a flat and heavy hardcover book, a cake pan with a flat bottom, or a tortilla press for pressing the pasta.
Flatten a piece of pasta between two pieces of plastic wrap using your preferred appliance. Remove the top layer of plastic wrap, and gently press the topping onto the concha dough, adding slight pressure to secure it.
Gently pull the remaining plastic wrap away from the concha. Repeat until all the dough has been topped.
Using a concha stamp dipped in flour (or a smooth paring knife), score each concha with a classic seashell design, or a swirl shell design. Be sure to not press too hard - only penetrate the topping, not the dough.
If using the paring knife method, create the first line at the center of the concha. Drag the knife from the top down gently, and taper it slightly as you approach the bottom (like the inner curve of a crescent moon).
Repeat 2-3 more lines on either side of the middle line, curving in the same direction.
For this particular type of concha, I enjoy the swirl design more as the pattern doesn't break apart too much when adding the filling.

Once all the conchas have been scored, cover them in plastic wrap again and allow them to rise another 45 minutes.
Prepare the Cheesecake Filling
Add the softened cream cheese to a bowl with 70 grams of sugar. Using a rubber spatula, combine the ingredients well.
Switch to a whisk and add in the whole egg and vanilla extract. Whisk until the mixture is smooth. Add salt to taste.
Cover loosely and set aside until ready to use.
Fill the Conchas
Use your two pointer fingers to create a crevice at the center of each concha that is about the depth and width of a rounded tablespoon. It’s better for the crevice to be deep versus wide. Pro tip: use the back of a tablespoon to create an indent in the middle of the concha. The width and depth of the tablespoon will work as a good measure.
Fill one pastry bag with the cheesecake filling (or use a spoon) and fill another with the strawberry preserves.
Fill each crevice with a tablespoon amount of both the cream cheese filling and the strawberry preserves.

After filling each concha, cover each tray loosely and allow the conchas to continue to rise while the oven preheats to 325 F, plus 20 minutes (to ensure the oven is properly heated throughout).
Bake the Conchas
Bake each tray of conchas for 24 minutes, rotating each tray at the 12 minute mark.
Sprinkle the conchas with the pink sugar while still hot out of the oven.
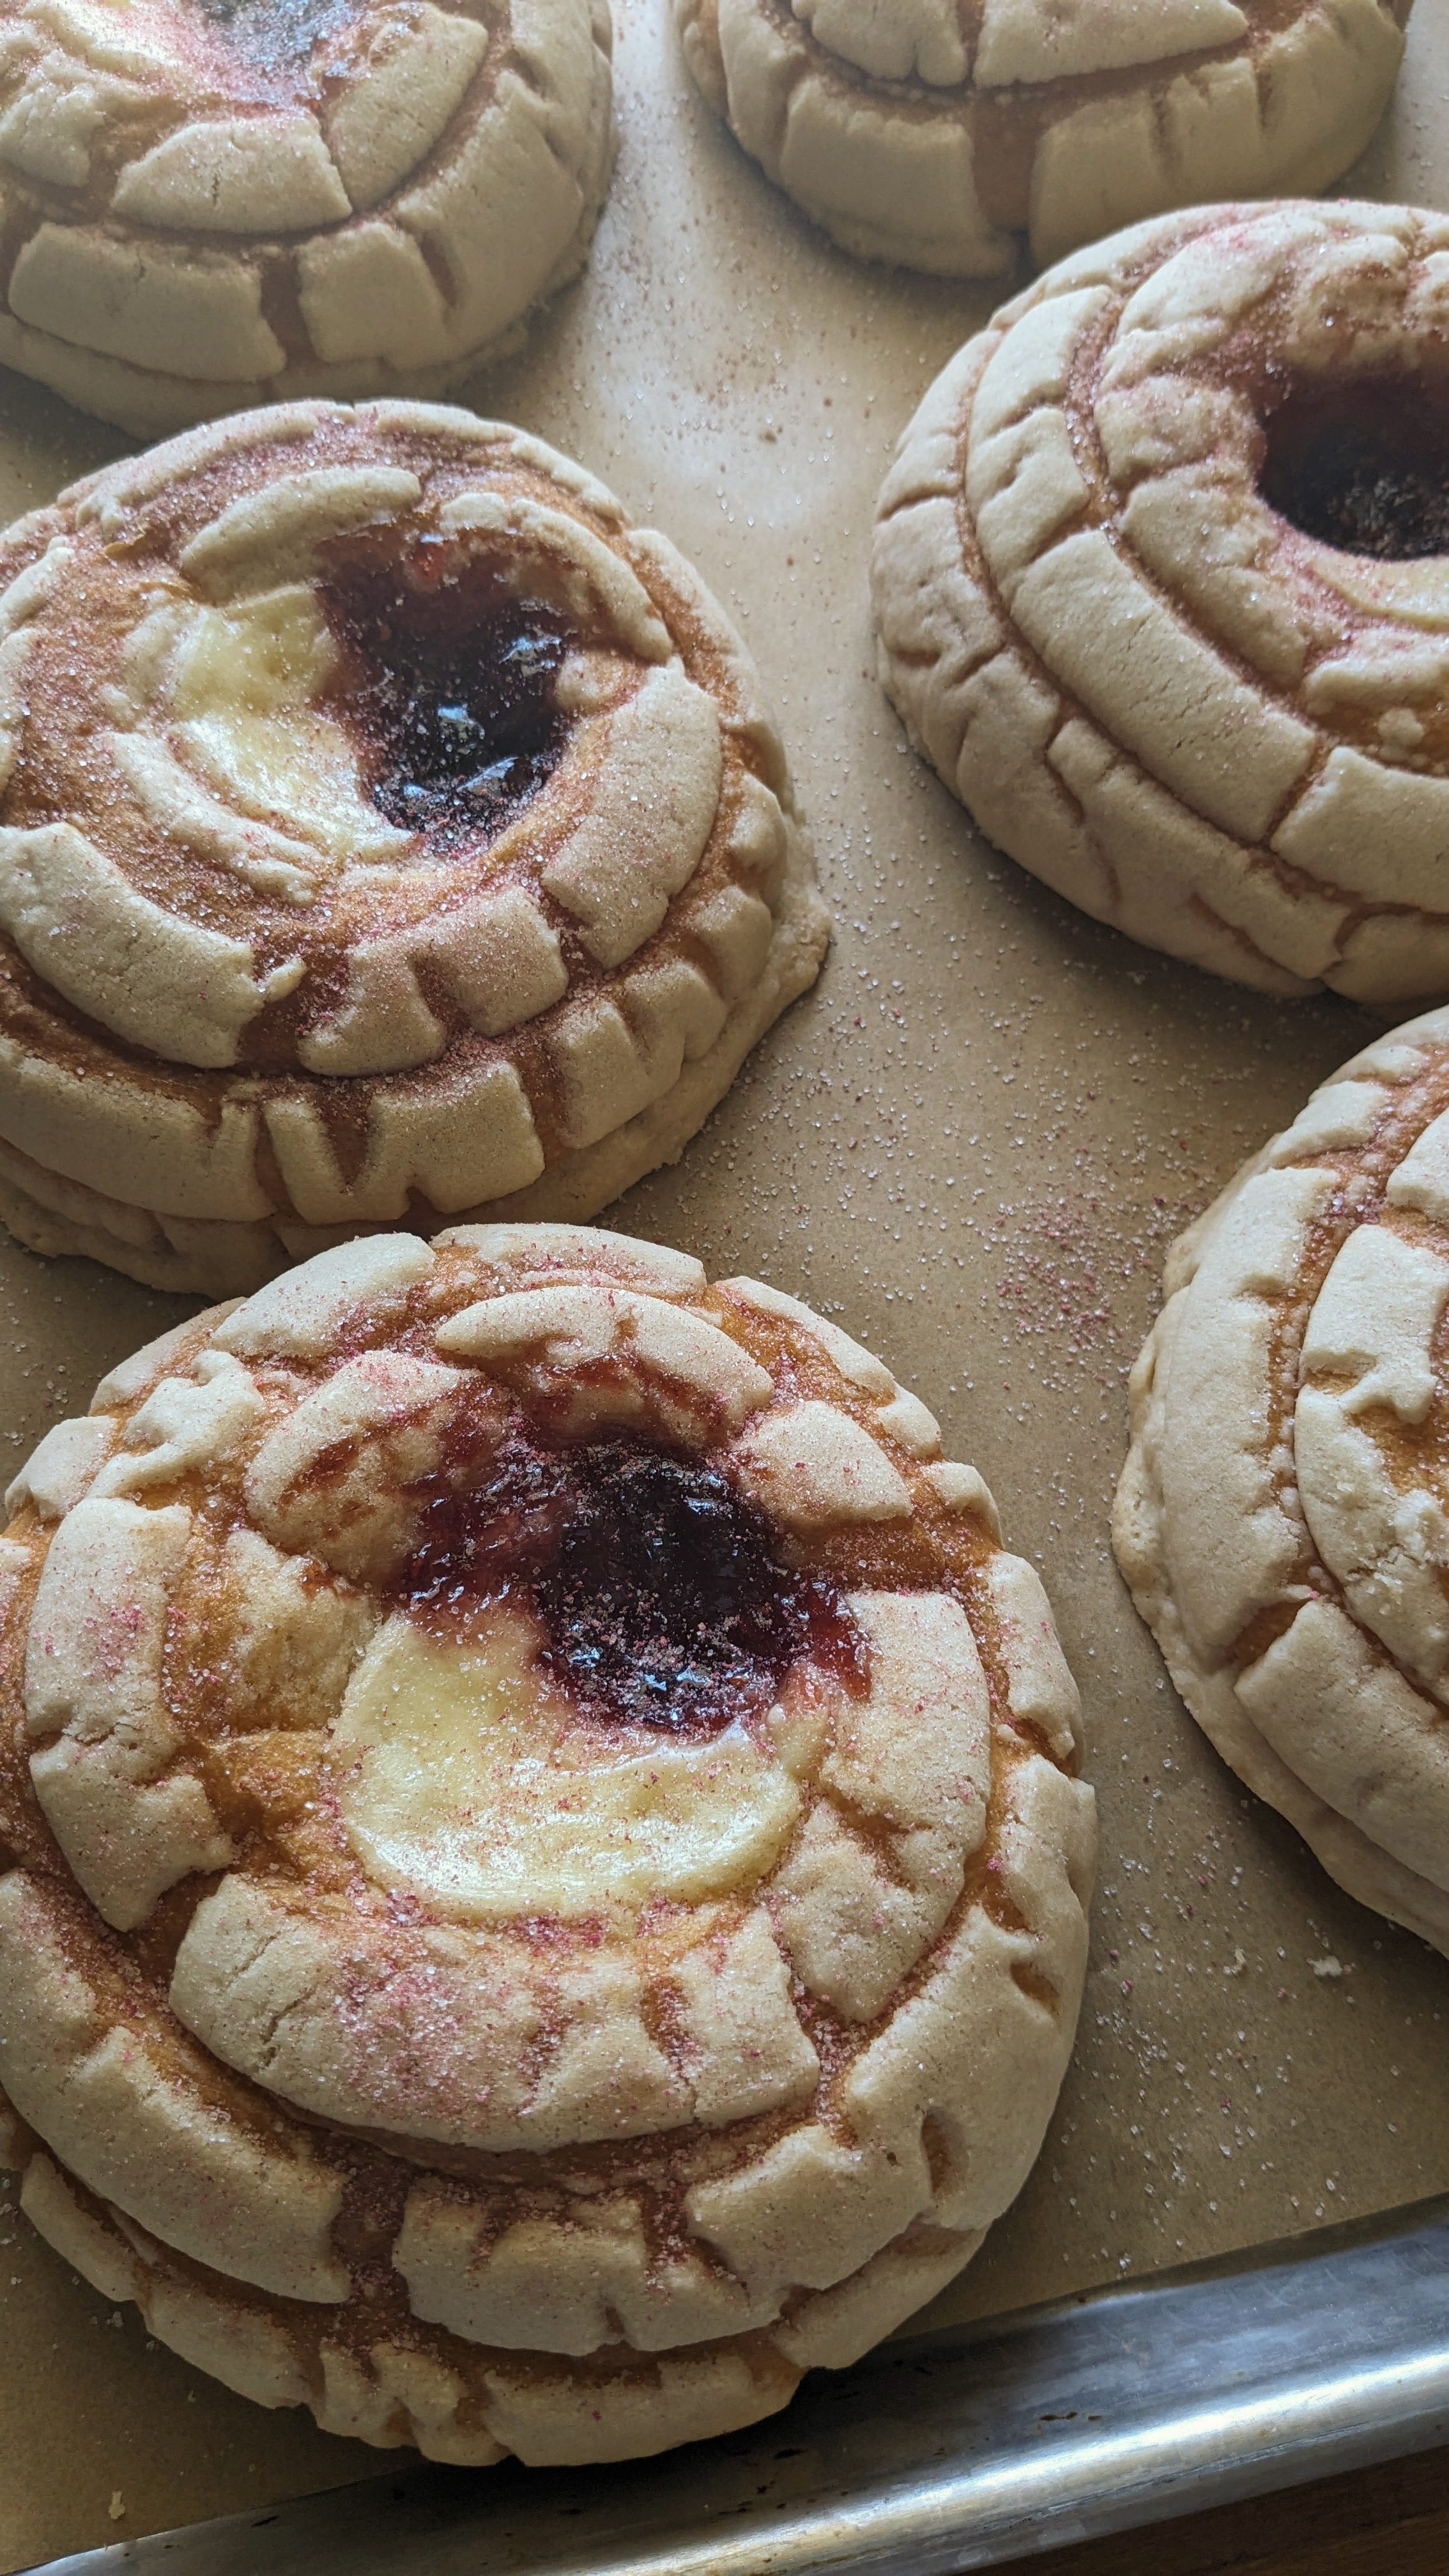
Allow the conchas to cool at least 20 minutes before devouring, as the fillings will be very hot.
Enjoy y'all. <3