
pan dulce: conchas
a most recent evolution of a concha recipe.

conchas may actually be my first love. for me, to bake and to share a concha is to love (and i think we can all agree that we are in need of love, especially right now).
for a year, i sold conchas from my small apartment kitchen to wonderful people who continued to come back for more. even after ending the business and experiencing severe burnout, an identity crisis, depression, conchas remain just as vital and influential to my baking as they did when i first began making them many years ago.
my understanding of the concha has evolved over the years - methods, ingredients and aesthetics. history. but ultimately, i am back to what i was looking for when i initially even began to think about baking conchas. the desire was always to find connection to a memory.
naturally, there’s some risk to that, because what i remember will not always align with the expectations and experiences of others.
my memory starts in my grandma’s apartment in anaheim, ca where my grandpa would wake me up early for a child, it was probably like 9am lol. we’d walk to the nearest market for carne, mazapan and conchas.
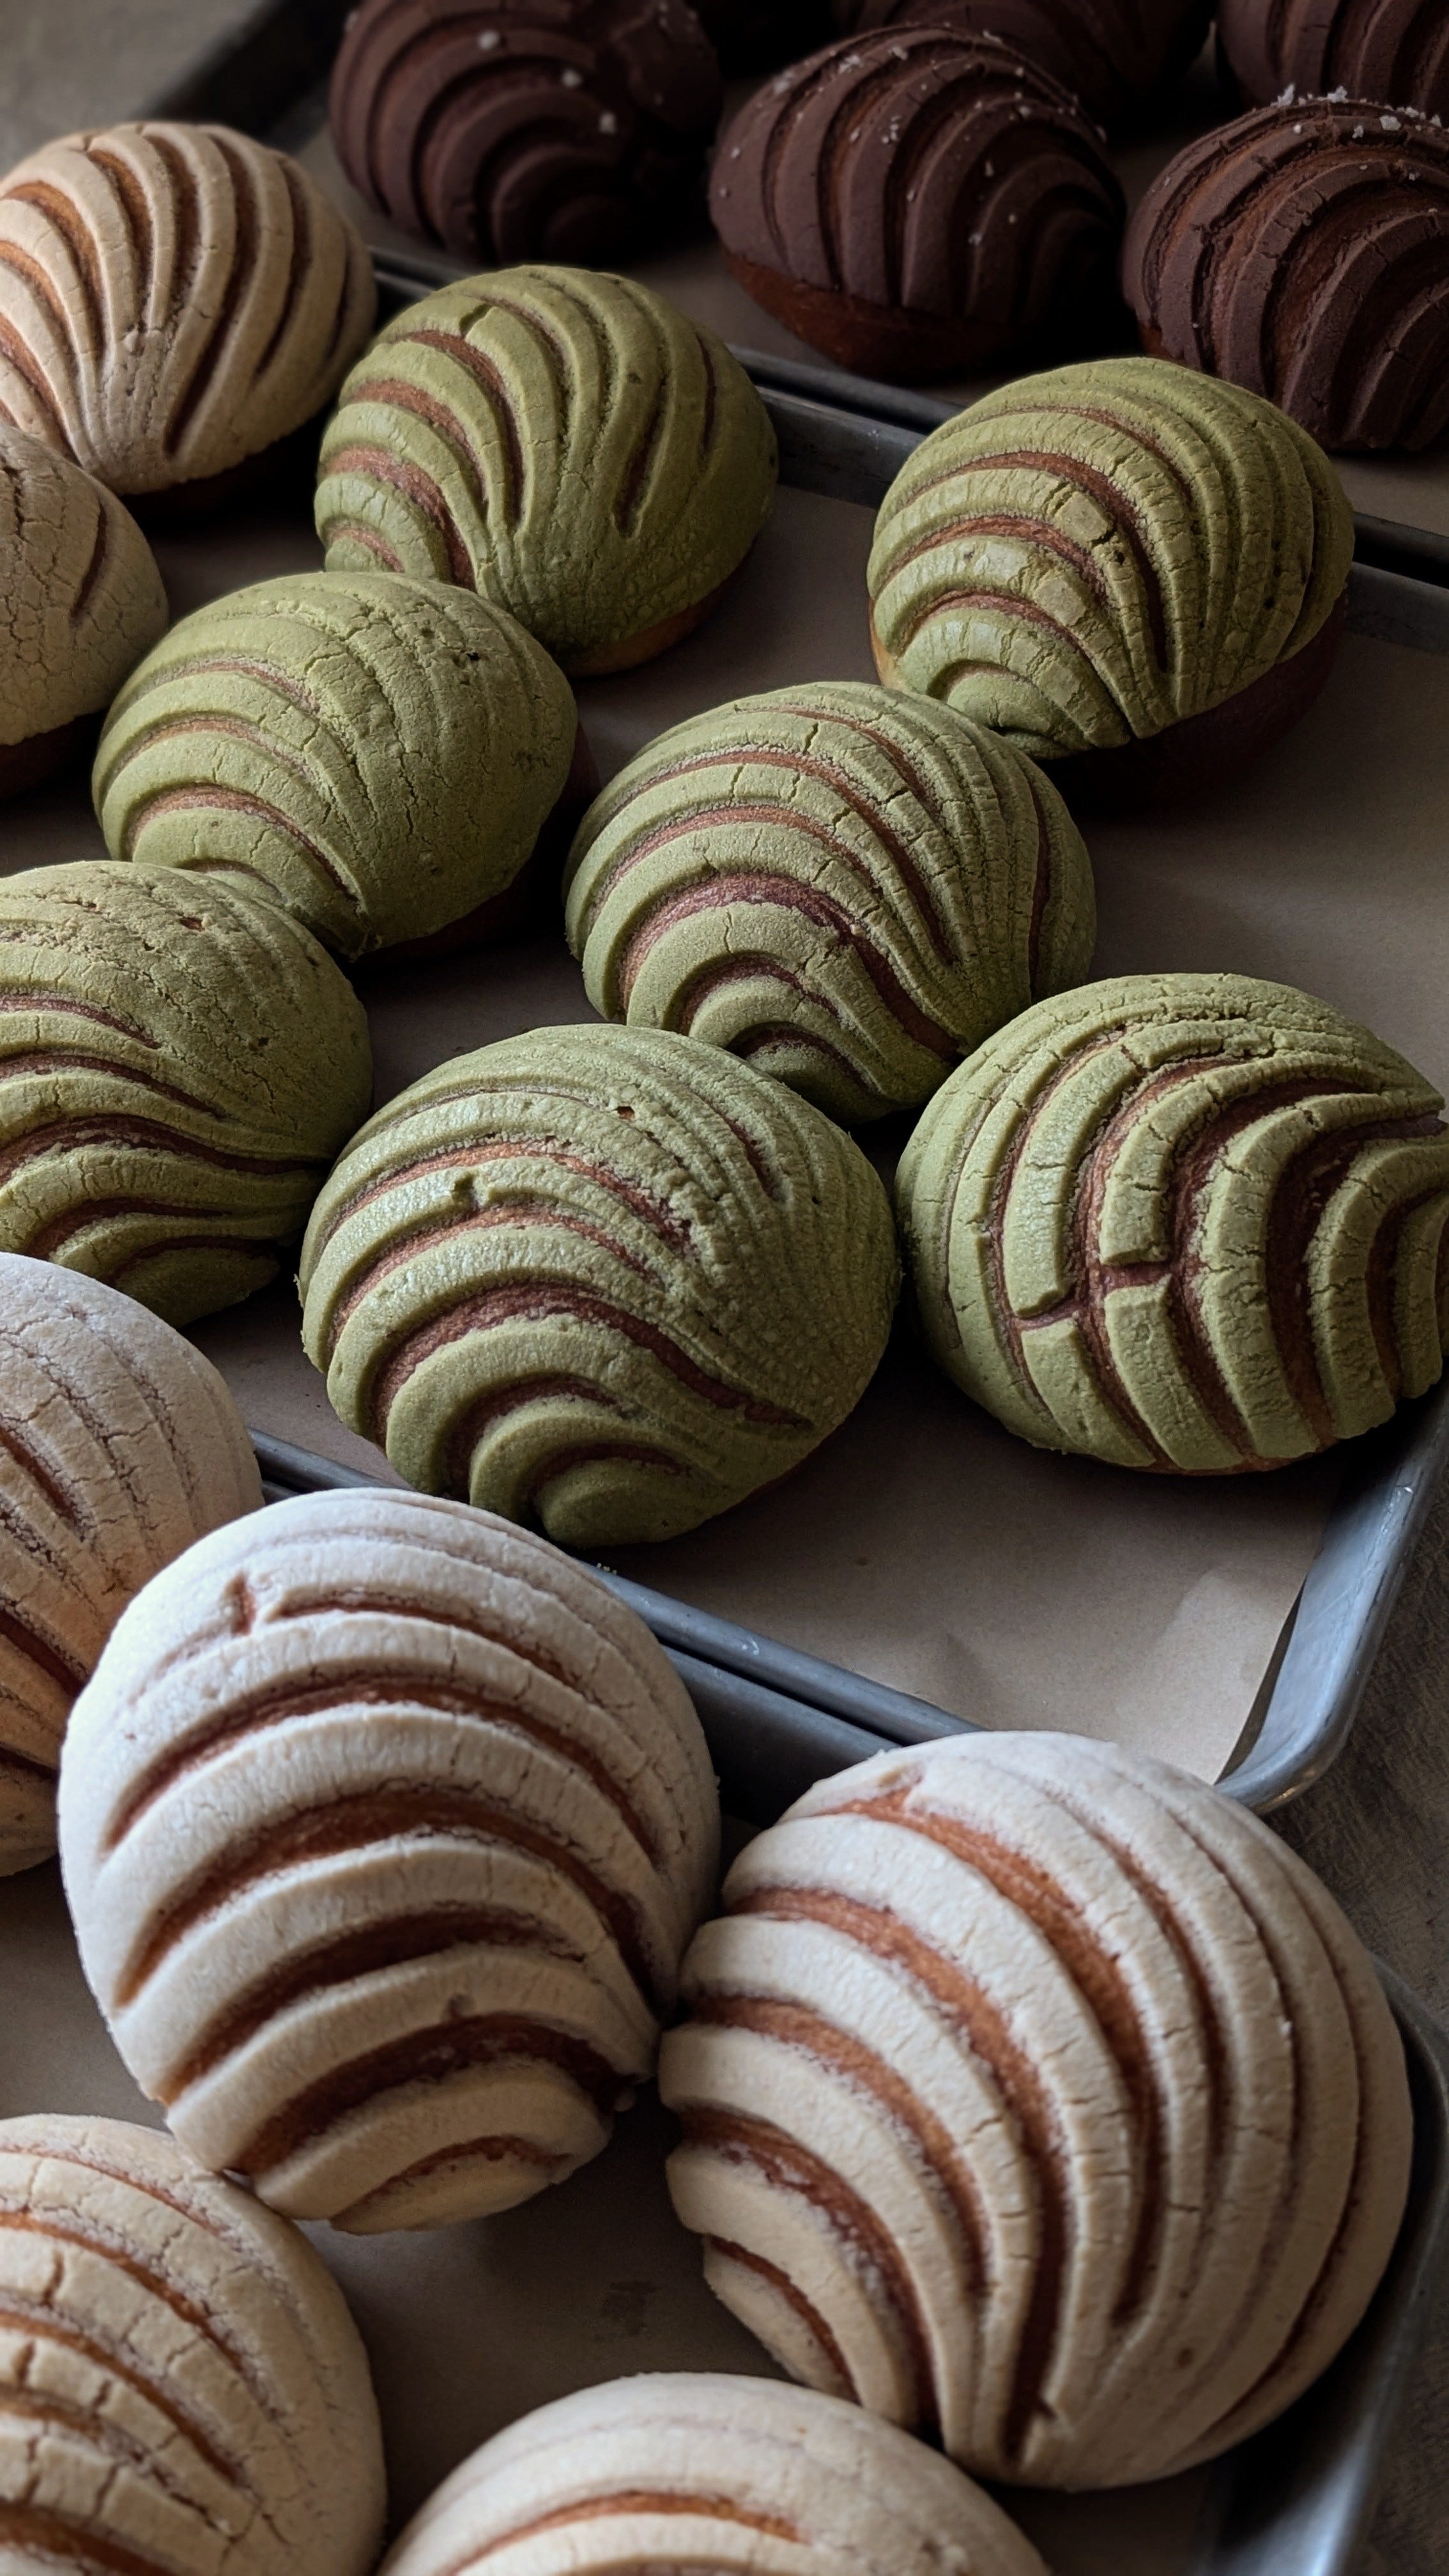
i’d come back with a white paper bag full of colorful shells, wasting no time to make a pastel sugary mess all over my grandma’s kitchen table. i left my conchas with all the topping picked off and the majority of the bread still intact.
this recipe is a result of years of research and tasting, trying to find that satisfying balance between buttery-soft and just lightly sweetened, with subtle notes of cinnamon and citrus. i’ve fought with my oven, trying to accomplish a concha that is perfectly browned and caramelized around the edges while still maintaining a plush center that will soak up all the cafecito in your mug.
i truly hope you find yourself pleased (and proud!) after making these.
some little tips
like the majority of my dough recipes, this follows a two day process. the first day is spent making the dough and allowing it to rise overnight in the fridge. a bulk rise in the fridge improves the texture and flavor of the dough, and makes shaping the dough later so much easier.
i also like to prepare the concha topping on day one to allow the flour, sugar and shortening to mingle for some time to create the most soft and ideal texture.
day two is for assembling the conchas. we shape the dough, allow it to rise, top the dough and score it, and allow it to rise some more.
it is important that the concha dough is allowed a proper rise time, especially during the colder months. the dough is enriched with lots of butter, which solidifies when cold. we need that butter in the dough to come back to room temperature as it rises so that the dough is plush and tender. too short of a rise time and you risk dense conchas.
a tip from me is to turn the oven on and place the pans with the dough right on top of the stove. as the stove warms due to the oven below, it’ll give the conchas a little extra boost in helping them rise properly.
i explain pretty much everything i know about the concha making process in this post here: a guide to baking conchas. it breaks down the types of ingredients i use for conchas and why, tools i like, and how to incorporate flavor using extracts, spices and powders such as freeze-dried strawberry, matcha, cocoa and more. if you have never made conchas before, i highly recommend starting there for some extra guidance.
but even with all the tips and tricks out there, there are no shortcuts to conchas. they simply are a process, and to me that is a huge part of my love for them and their history.
PAN DULCE RECIPE: CONCHAS
makes: 12-15 conchas | prep time: 45 minutes | resting time: 3 hours | chill time: 12 hours | bake time: 18-20 minutes per pan
enriched dough
9 grams active dry yeast
45 grams light brown sugar
120 ml whole milk warmed gently
3 large eggs cold, 150 grams
2 yolks from large eggs cold, about 36 grams
375 grams bread flour
30 grams milk powder
1 teaspoon ceylon cinnamon
8 grams kosher salt
zest of 1 navel orange
165 grams salted butter cold and cubed
egg wash
1 egg large
1 tablespoon milk or water
concha topping (pasta)
110 grams confectioners’ sugar
110 grams flour all-purpose or bread
110 grams shortening
pinch of sea salt
2 teaspoon pure vanilla extract
for matcha, add 2 teaspoons matcha powder
for cocoa, remove 1 tablespoon flour, add 1 tablespoon dutch-process cocoa

suggested tools
stand mixer w/ dough hook attachment
13 x 18” sheet pans
dough or bench scraper for portioning dough
day one preparation
prepare the enriched dough
to the bowl of a stand mixer, combine 9 grams active dry yeast and 45 grams light brown sugar. pour 120 grams of gently warmed milk into the bowl and stir until just combined. set aside to activate, about 3-5 minutes.
to the same bowl, add 3 large eggs, 2 large yolks, 375 grams bread flour, 30 grams milk powder, 8 grams kosher salt, 1 teaspoon ceylon cinnamon, and zest of 1 navel orange.
using a dough hook, knead on low speed for 15 minutes to allow some gluten development. after 15 minutes, add 165 grams cold, cubed salted butter all at once and increase the mixer speed to medium high.
knead for 25-30 more minutes or until the dough has come together and is smooth and elastic gently pull a small amount of dough to test the elasticity. the dough will be very soft and supple, and will pull cleanly from the sides when it’s ready.

lightly oil your hands and roll the dough into a ball, and place it into a large, lightly oiled bowl or dough container. cover securely and set in the fridge for an overnight rise, 12 hours.
prepare the pasta
to a large bowl combine 110 grams flour, 110 grams confectioners’ sugar, and 110 grams shortening.
begin mixing with a rubber spatula, by hand, or with a paddle attachment set to low speed if using a stand mixer. as you mix, gradually add in a pinch or two of kosher salt, and stream in 2 teaspoons pure vanilla extract.
continue to mix until the pasta has come together like soft cookie dough, and you’re able to press and knead it together between your hands.
massage the pasta to ensure there are no clumps of flour or sugar remaining the heat of your hands will help to soften the dough as well, making it smooth and perfect for molding.
wrap it securely and allow to rest at room temperature overnight.
day two preparation
shape the dough
turn the cold concha dough out onto a clean, lightly oiled surface or baking mat.
weigh the dough, and divide the weight in grams by 12 or 15, depending on how many pieces of bread you want. i usually weigh out 60 grams per piece for a total of 15 pieces.
to roll the dough, flatten out a piece with your palm to expel any air. roll the flattened dough into a log, then cup your hand around it and roll it around in a circular motion. the friction of the surface with your hand will shape the dough into a ball.
after all the dough has been shaped, place them directly only sheet pans lined with parchment paper. you can fit up to 6 conchas per 13 x 18” sheet pan.

cover the dough with a kitchen towel or plastic wrap, and allow the dough to rest and rise for 60 minutes, or until visibly larger but not fully doubled.
assemble the conchas
in a small mug, combine a large egg with a tablespoon of milk or water. mix together well using a fork. brush each dough ball with the egg wash.
divide the pasta concha topping into 12-15 equal sized pieces weigh and divide for better accuracy; for 15 conchas, i like to use 20 grams of pasta per concha. roll each piece between your hands to form a smooth ball.
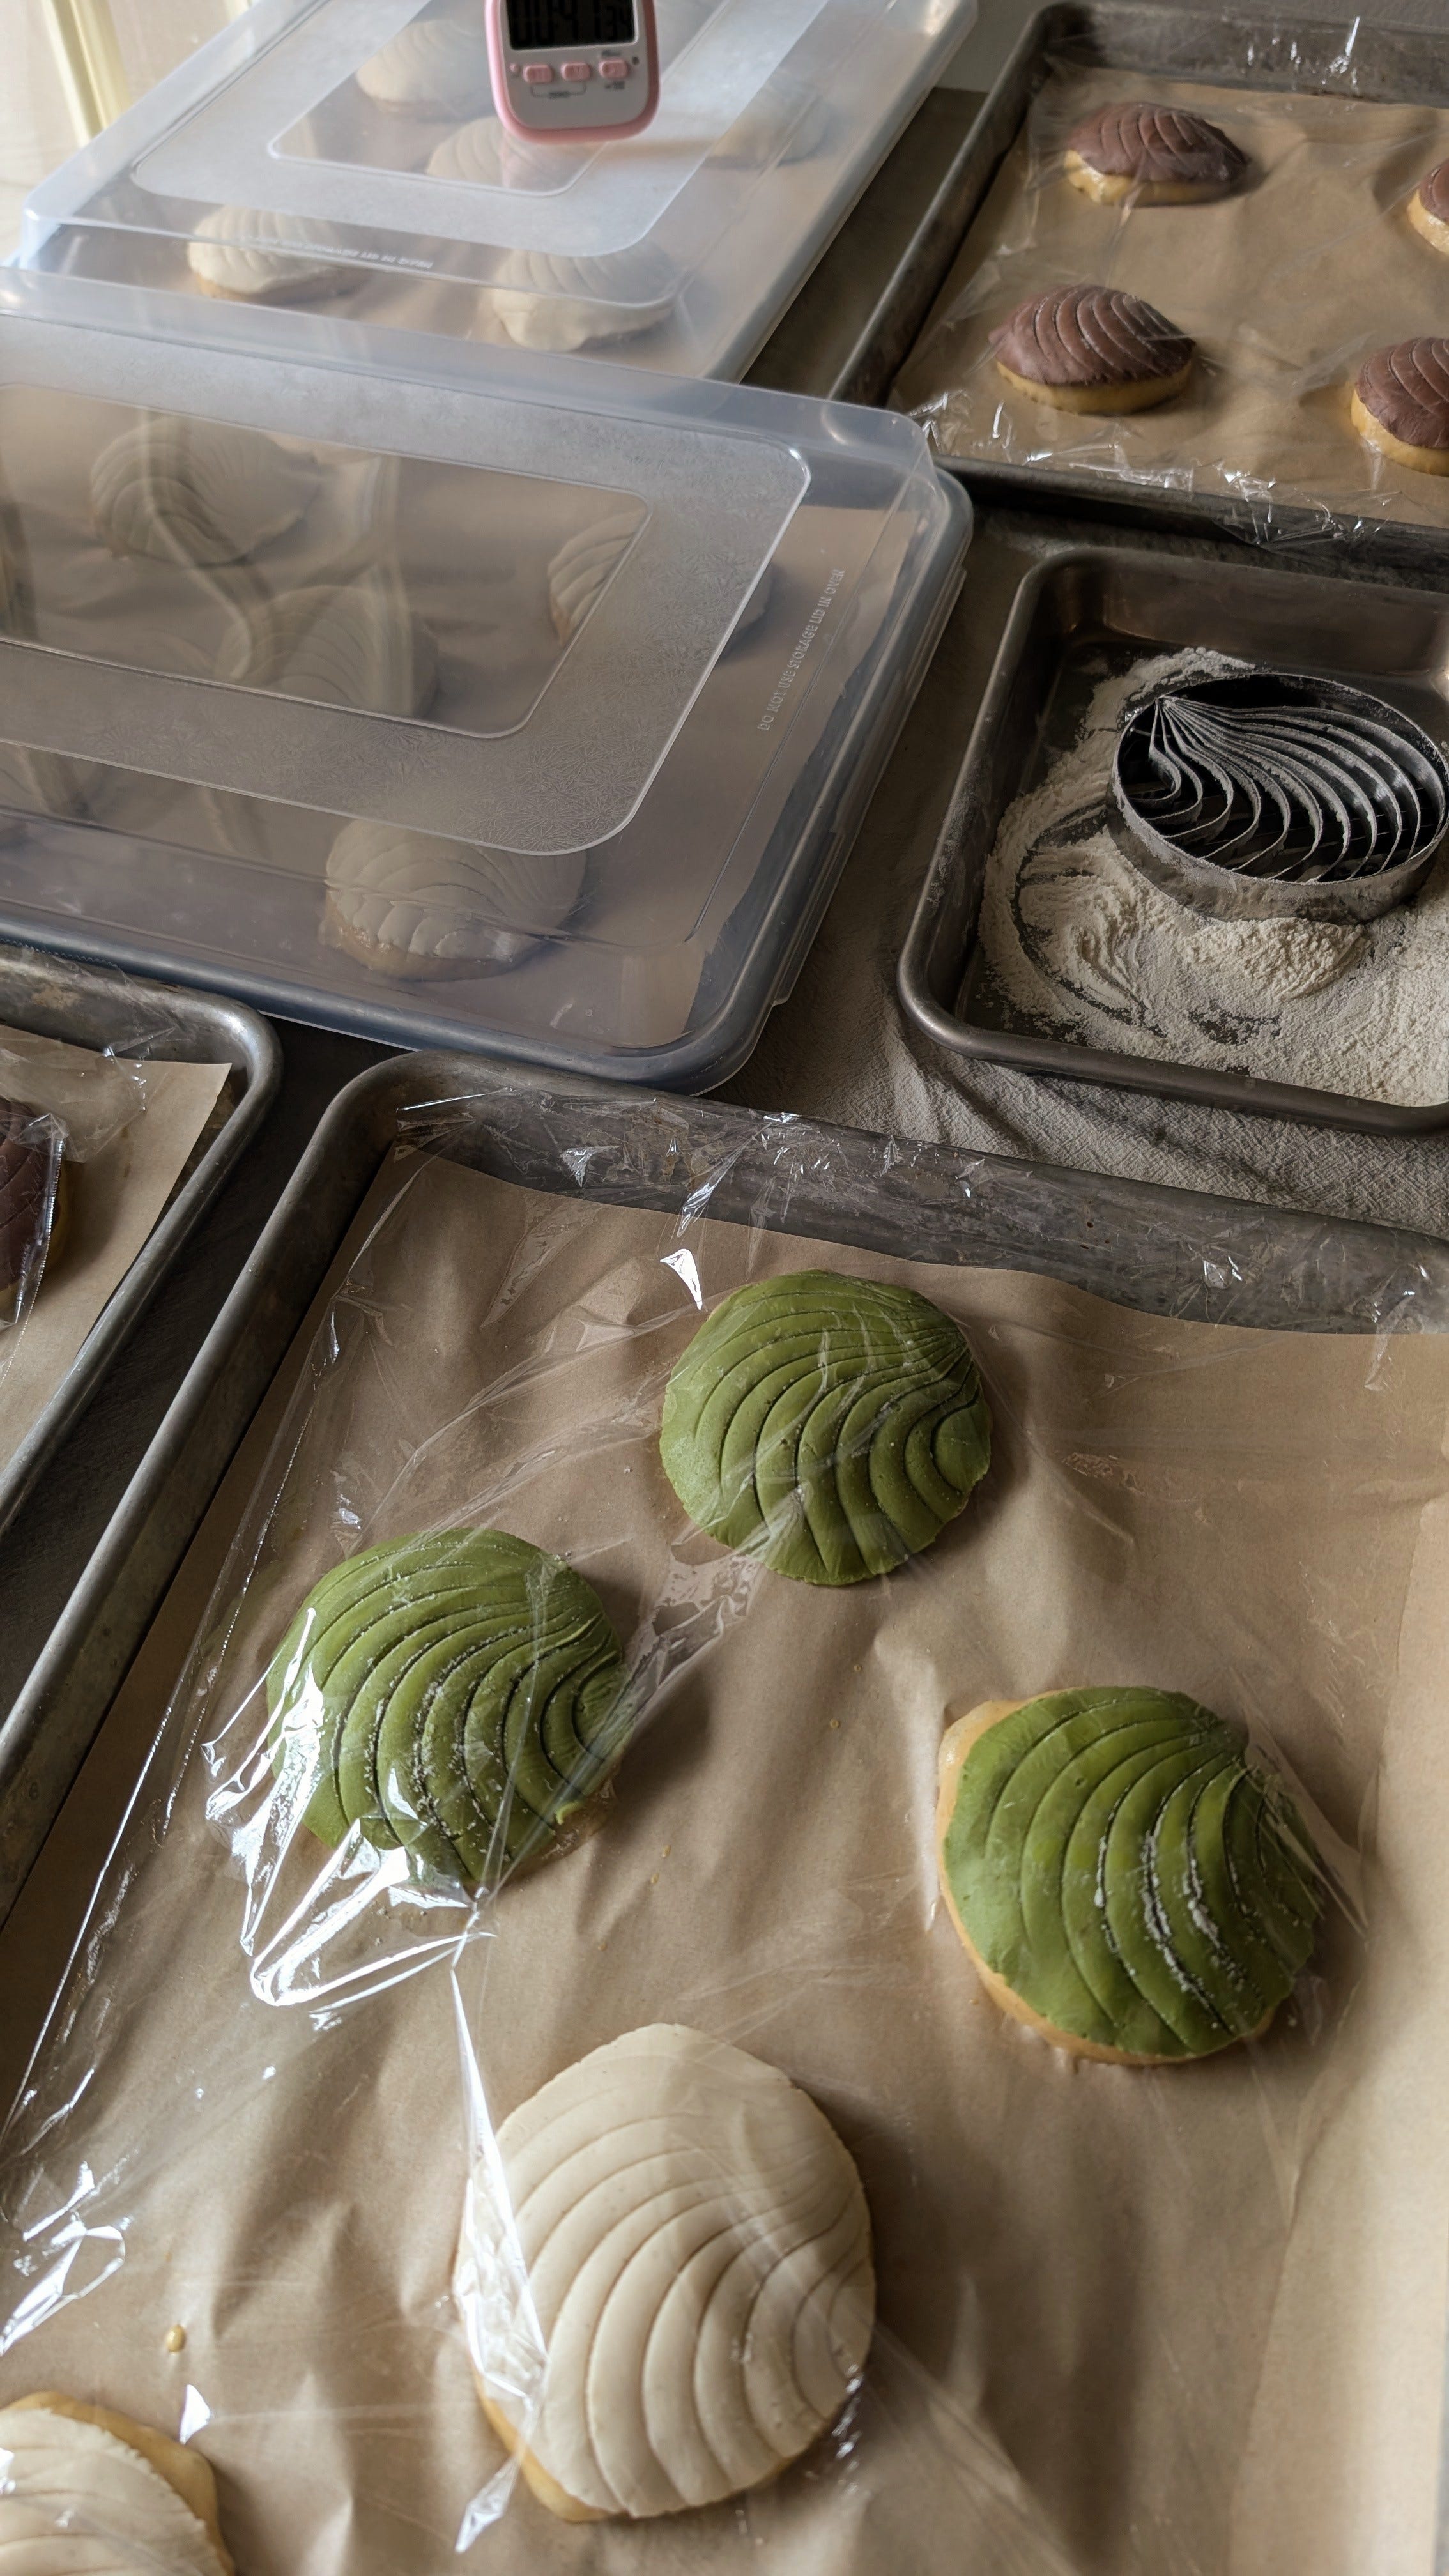
prepare your concha stamp or paring knife by coating it in flour, and locate a flat and heavy hardcover book, a cake pan with a flat bottom, or a tortilla press for pressing the pasta.
place a piece of pasta between two layers of plastic wrap, and flatten it gently using your preferred appliance. remove the top layer of plastic wrap, and gently press the topping onto the concha dough, adding slight pressure to secure it.
gently pull the remaining plastic wrap away from the concha. repeat until all the dough has been topped.
using a concha stamp dipped in flour (or a smooth paring knife), score each concha with a classic seashell design.
if using the paring knife method, create the first line at the center of the concha. drag the knife from the top down gently, and taper it slightly as you approach the bottom (like the inner curve of a crescent moon).
repeat with 2-3 more lines on either side of the middle line, curving in the same direction.

examples from a 2023 post but same process and idea! once all the conchas have been scored, cover them again and allow to rise for 1 hour.
preheat the oven to 350 F, and place the concha pans on top of the stove while the oven heats up. allow them to rise 30-45 more minutes. the conchas are ready to bake when they are visibly doubled in size, and the topping spreads enough for you to see the dough underneath.

bake the conchas
bake each tray of conchas for 18-20 minutes at 350 F, rotating each tray at the halfway mark.
allow the conchas to cool for 15 minutes before handling, and enjoy.

take care of yourselves this week. i’ll be doing my best to remind myself to take it all day by day.
channey
what a sweet gift from you to us, I can tell how intimately you know the concha, and honored to have time-tested recipe to stow away for future baking! It is on my list after your tiramisu :)
I'm new to at-home concha making, and think the concha stamp is so cool! p.s., sending hugs and comfort ❤️
Thank you for all the detailed information and instructions! What Barton Springs Mill flours and ratios do you use? Thanks again, Felix